Hanging a cuckoo clock is a fun and rewarding project that can add charm to any room. Whether you’re hanging a traditional or modern cuckoo clock, the process is relatively simple if you follow a few key steps. In this post, we’ll go over the basics of hanging a cuckoo clock, from choosing the right location, to properly setting up the clock, to adjusting the settings for the best possible performance. With the right preparation and a bit of patience, you’ll be able to enjoy the timeless beauty of a cuckoo clock in your home.
Prepare the wall for the cuckoo clock
by first determining the best location for the clock. Make sure the clock is placed in an area with ample space that won’t be blocked by furniture or other items. Once you have decided the best spot for the clock, the next step is to ensure that the wall is secure, so the clock won’t become unstable over time.
If you are hanging the clock on drywall, use wall anchors to secure the wall plate. For a concrete wall, use a masonry drill bit and securely attach the wall plate with screws. Additionally, you should check the area to make sure it’s free of dust or debris. Finally, make sure there are no water pipes, electrical wires, or other items that may interfere with the clock. With the wall prepared, you can now move forward toward properly installing your cuckoo clock.
Assemble the cuckoo clock

by first considering the size of the wall and the current décor in the room. Make sure the clock is placed in an area with ample space that won’t be blocked by furniture or other items. Once you have decided the best spot for the clock, the next step is to ensure that the wall is secure, so the clock won’t become unstable over time. If you are hanging the clock on drywall, use wall anchors to securely attach the wall plate. For a concrete wall, you will need to use a masonry drill bit and securely attach the wall plate with screws. Additionally, you should check the area to make sure it’s free of dust or debris. Finally, make sure there are no water pipes, electrical wires, or other items that may interfere with the clock.
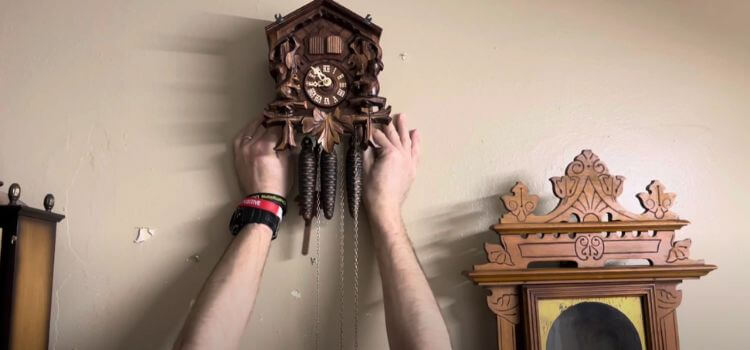
With the wall properly prepared, you can now assemble the cuckoo clock. Begin by attaching the base of the clock to the wall plate with the screws provided. Then, mount the clock assembly on the wall plate. Position the clock mechanism into the base and lock it in place. Attach the clock hands and bells to the mechanism, making sure they are properly secured. Once everything is in place, hang the pendulum on the clock mechanism. Finalize the installation by plugging in the clock and adjusting the time using the knob on the back of the clock.
Installing a cuckoo clock may seem like a complex task, but with the right preparation and the right tools, you can easily complete the job properly and safely. With the process outlined above, you can have a beautiful cuckoo clock installed in your home in no time.
Attach the cuckoo clock to the wall
by following these simple steps. First, attach the wall plate to the wall with the screws provided. Then, take the clock assembly and mount it on the wall plate. Make sure it is properly secured. Next, take the clock mechanism and position it in the base of the clock. After that, attach the clock hands and bells to the mechanism. Secure them with the screws provided. Once the clock hands and bells are secured, place the pendulum on the clock mechanism.
Finally, plug in the clock and adjust the time using the knob on the back of the clock. With the process outlined above, you can easily install a cuckoo clock in your home. Make sure to take your time and ensure that everything is properly secured before plugging in the clock. Doing so will help ensure that your cuckoo clock runs smoothly and accurately.
Insert the battery and set the time
Start by inserting the battery into the back of the clock. Once that is done, you will need to use the screws provided to secure the battery in place. Once the battery is secure, you will need to set the time on the clock. This can be done by turning the knob on the back of the clock. Be sure to take your time when setting the time, as the time needs to be accurate for the clock to work correctly.Once the time is set, you can continue to assemble the clock. Start by attaching the clock hands and bells to the mechanism. Secure them with the screws provided and make sure all the pieces are locked in place.
Once the pieces are properly secured, place the pendulum on the clock mechanism and secure it with the screws provided. Finally, plug in the clock and you are ready to go. With the process outlined above, you can easily install a cuckoo clock in your home. Make sure to take your time and ensure that everything is properly secured before plugging in the clock. Doing so will help ensure that your cuckoo clock runs smoothly and accurately.
Adjust the sound level of the cuckoo
clock to suit your desired level. To do this, you will need to locate the control knob on the back of the clock. If the volume is too loud or too soft, simply turn the knob until you find the desired volume. If you are having trouble locating the knob, consult the user manual of your clock for assistance. Once you have found the knob, you can adjust the sound level of the cuckoo accordingly. Make sure to be careful when turning the knob as too much force can damage the clock mechanism. Once you have adjusted the sound level of the cuckoo to the desired volume, you can now enjoy the soothing sound of the cuckoo clock.
Test the clock to make sure it works properly

by setting the time correctly and listening for the cuckoo sound. Start by ensuring that you have the correct time set on the cuckoo clock. To do this, you can use the manual time-setting lever on the back of the clock. Once you have the time set, you can then proceed to test the cuckoo sound. To do this, you should locate the control knob on the back of the clock. Make sure to turn the knob slowly and carefully to ensure that you do not damage the clock mechanism. You can then listen for the sound of the cuckoo to make sure that it is working properly. Once you have tested the cuckoo sound and the clock is running correctly, you can now enjoy the soothing sound of the cuckoo clock.
Conclusion
Hanging a cuckoo clock is a straightforward process, but it is important to take the time to do it properly. Take a few moments to make sure that you have all the necessary materials and that you understand the steps involved. Be sure to follow the manufacturer’s instructions and use the correct tools to hang your cuckoo clock. With a bit of patience and attention to detail, you can enjoy the melodious sound of your cuckoo clock for years to come.
Frequently Asked Questions
You will need a drill, a screwdriver, a level, and wall anchors.
Choose a spot that is away from direct sunlight and moisture. Make sure the wall is strong enough to hold the clock.
Use the wall anchors to attach the clock to the wall. Make sure the clock is level before you drill the anchors in.
You should use plastic anchors for drywall and metal anchors for plaster.
Yes, it is important to use the correct screws for the clock. Make sure the screws are the right size and length for the clock.
To set the time on the cuckoo clock, you will need to pull the chains or turn the knob on the back of the clock.
To adjust the chime, you can use the chains or the knob on the back of the clock.
You should wind the cuckoo clock once a week.