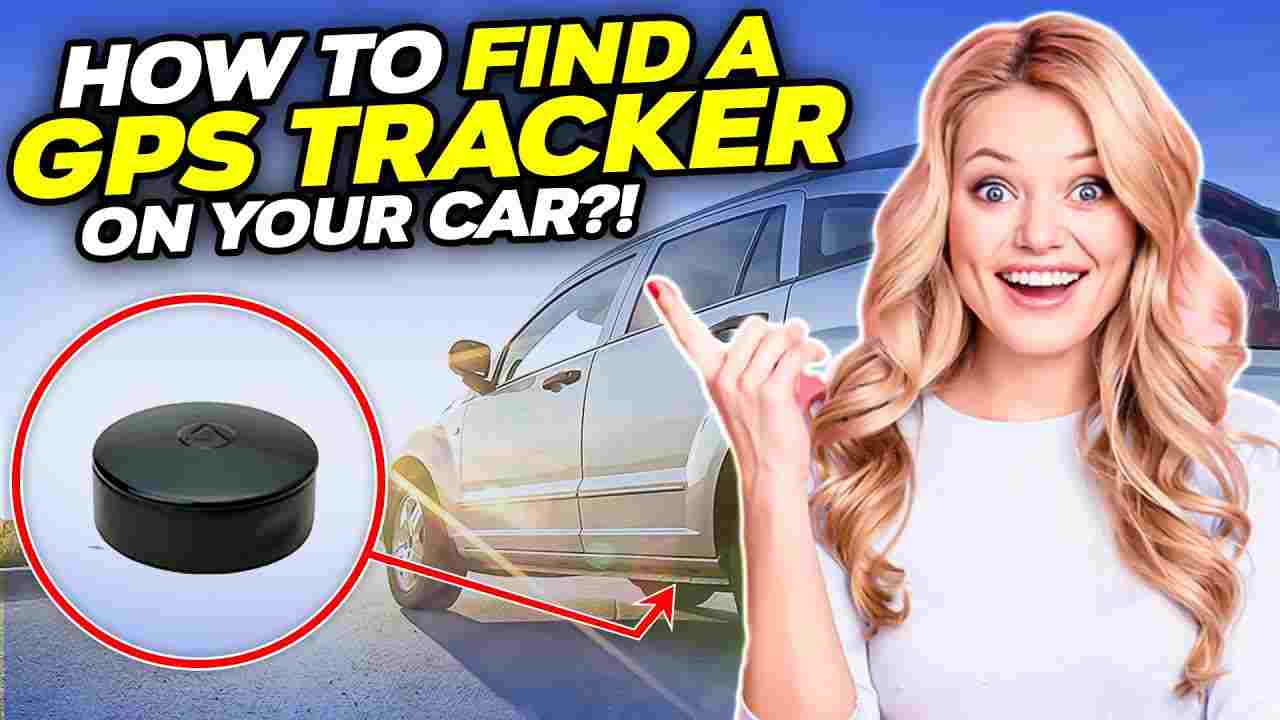
• Skip to main content
  • Skip to primary sidebar
  • About Us
  • Contact us
  • Affiliate Disclosure
  • Terms of Use
  • Cookie Privacy Policy
  • Privacy Policy

getlystr

How to Keep Tires from Dry Rotting

One of the most important tasks for any vehicle owner is to maintain the tires in good condition. This not only helps the vehicle perform better but also helps to ensure the safety of the driver and other passengers. One of the most common problems with tires is dry rot, which is caused by a breakdown of the rubber due to exposure to the elements and other factors. In this article, we’ll explain what dry rot is and how to keep tires from dry rotting.

 
Understand What Causes Tire Dry Rot

Tire dry rot is a common problem that can cause irreversible damage to your tires. It is caused by the breakdown of the rubber in the tires due to exposure to the elements and other factors. Dry rot can happen to any type of tire, including all-season tires, winter tires, and performance tires. Damage from dry rot includes cracking, splitting, and bulging of the tire. In order to avoid damage from tire dry rot, it is important to understand what causes it and how to prevent it.

Common causes of dry rot include extreme temperatures, UV rays from the sun, and exposure to water. Tires that are stored in an area with excessive temperature or humidity are more prone to dry rot. In addition, tires that are not driven regularly can also be affected by dry rot, as the rubber will not be able to move and flex, leading to cracking and brittleness.

In order to prevent tire dry rot, it is important to ensure that your tires are properly maintained. This includes checking the air pressure regularly and rotating the tires according to the manufacturer’s recommendation. You should also make sure to store your tires in a cool, dry place. Additionally, it is important to inspect your tires regularly for signs of dry rot, such as cracking, splitting, and bulging.

Inspect Your Tires Regularly

To ensure that your tires are in the best possible condition, you should inspect them regularly. Tire dry rot is a common problem in hot and humid climates, but it can also occur in cooler temperatures with less humidity. Common causes of dry rot include extreme temperatures, UV rays from the sun, and exposure to water. Tires that are stored in an area with excessive temperature or humidity are more prone to dry rot. In addition, tires that are not driven regularly can also be affected by dry rot, as the rubber will not be able to move and flex, leading to cracking and brittleness. Therefore, it is important to check your tires regularly for signs of dry rot.

In order to prevent tire dry rot, it is important to ensure that your tires are properly maintained. This includes checking the air pressure regularly and rotating the tires according to the manufacturer’s recommendation. You should also make sure to store your tires in a cool, dry place. Additionally, it is important to inspect your tires regularly for signs of dry rot, such as cracking, splitting, and bulging. If you see any signs of dry rot, you should have your tires inspected by a professional. Not only will this extend the life of your tires, but it will also help to ensure your safety while driving. Taking these simple steps to inspect and maintain your tires will help to keep your car running safely and efficiently.

Use the Right Tires for Your Vehicle

is important to ensure that you are driving safely and efficiently. It is important to check your tires regularly for signs of dry rot. Dry rot can cause your tires to crack, split, and bulge, leading to tire failure and even accidents. In order to prevent tire dry rot, you should monitor your tire pressure regularly and rotate the tires periodically according to the manufacturer’s recommendations. Additionally, it is important to inspect your tires regularly for signs of dry rot, such as cracking, splitting, and bulging. Not only will this extend the life of your tires, but it will also help to ensure your safety while driving. Taking these simple steps to inspect and maintain your tires will help to keep your car running safely and efficiently.

Avoid Over-Inflation or Under-Inflation of Tires

It is important to maintain the proper air pressure in your tires according to the manufacturer’s recommendations. Over-inflating or under-inflating your tires can lead to tire dry rot, which can cause your tires to crack, split, and bulge. This can make them prone to failure, leading to dangerous situations while driving. Not only can these situations lead to major damage to your car, but they can also cause serious injury or death. To prevent such occurrences, it is important to monitor your tire pressure regularly and rotate them according to the manufacturer’s specifications.

Additionally, it is important to store your tires in a cool, dry place. This will help to protect them from damage and keep them in optimum condition. Finally, it is a good idea to inspect your tires periodically to make sure there are no signs of dry rot. Taking these simple steps to inspect and maintain your tires will help to keep your car running safely and efficiently and help you avoid any dangerous situations.

Store Your Tires Properly

When your tires are not properly stored, it can lead to serious problems down the road. Improperly stored tires may become brittle and weaken, leading to dangerous situations while driving. Not only could these situations cause major damage to your car, but they can also cause serious injury or death. To avoid these scenarios, it is important to take preventative measures and store your tires in a cool, dry place, monitor their pressure, and rotate them according to the manufacturer’s specifications. Additionally, it is important to inspect your tires periodically to make sure there are no signs of dry rot.

Use Tire Sealants

to protect your tires from punctures and other damage caused by foreign objects. Tire sealants are designed to fill in any cracks and holes in a tire and seal them so that they are protected from further damage. Tire sealants can be found in any automotive shop, and they often come in a spray bottle or aerosol can. Applying tire sealant is an easy and inexpensive way to reduce the risk of punctures and other damage caused by debris. When you use tire sealant, make sure to follow the instructions carefully and avoid getting any on your skin or in your eyes.

Finally, it is a good idea to inspect your tires periodically to make sure there are no signs of dry rot. Taking these simple steps to inspect and maintain your tires will help to keep your car running safely and efficiently and help you avoid any dangerous situations. Additionally, using tire sealants is a great way to protect your tires from punctures and other damage.

Clean and Wax Your Tires Regularly

is a must if you are an avid car enthusiast. Cleaning and waxing your tires is an important part of keeping them in top condition and helping you to get the most out of your car. Cleaning and waxing your tires will help them to last longer and look better. When you clean and wax your tires, first make sure that you have the right supplies. You will need a tire cleaner, a degreaser, a wax, and a soft cloth or sponge. Start by using the tire cleaner to remove any dirt and debris from the tires. Once you have thoroughly cleaned the tires, use the degreaser to remove any oil and grease.

Finally, apply the wax to the tires and use the cloth or sponge to spread it evenly. This process will help to protect your tires from damage caused by the elements and will also improve their appearance. Additionally, regular cleaning and waxing of your tires can reduce the risk of punctures and other damage caused by debris. Taking the time to inspect and maintain your tires will make sure that your car is running safely and efficiently and help you avoid any dangerous situations.

Conclusion

In conclusion, taking the necessary steps to ensure your tires are protected from dry rot can help extend their life and keep you safe on the road. Regularly checking and maintaining your tires is the best way to keep them from dry rotting. Ensure there is enough air in the tires, rotate them regularly, and keep them clean and free from debris. If you live in an area with extreme temperatures, you should also consider investing in a tire sealant to help protect your tires from the elements. With proper care and maintenance, your tires will be in good condition for years to come.

Frequently Asked Questions

What causes tires to dry rot?

Dry rot is caused by prolonged exposure to the elements, like the sun, rain, and snow. It can also be caused by a lack of air pressure in the tire.

How can I prevent dry rot?

You can prevent dry rot by regularly checking the tire pressure and making sure that your tires are properly inflated. You should also store your tires in a cool, dry place when not in use.

What should I do if I find dry rot on my tires?

If you find dry rot on your tires, you should replace them right away. Dry rot can weaken the structure of the tire and make it unsafe to drive.

What kind of tire should I buy to avoid dry rot?

Look for tires that are specifically designed to resist dry rot. These tires are usually made from synthetic rubber compounds that are more resistant to the elements.

How can I tell if my tires are dry rotting?

You can tell if your tires are dry rotting if you notice cracks in the sidewall or tread of the tire. You may also notice that the tires are losing air pressure more quickly than usual.

Are there any special cleaners I can use on my tires to prevent dry rot?

You can use a tire cleaner specifically designed for dry rot prevention. These cleaners are often made from natural oils that help to protect the rubber from the elements.

Is there anything else I can do to help prevent dry rot?

Make sure to rotate your tires every 6,000 miles or so. This will help to evenly distribute the wear on the tires and help to prevent dry rot from occurring.

How Long Do Tires Last In Florida?

Tires are an important part of any vehicle and it’s important to know when it’s time to replace them. In Florida, the climate can have an effect on how long tires last and how quickly they wear down. In this blog post, we’ll take a look at how long tires last in Florida and what you can do to keep your tires in good condition for as long as possible. We’ll also discuss why it’s important to replace your tires on time and how you can tell when it’s time to buy new ones.

Factors that affect the life of a tire in Florida

include the heat and humidity of the climate, the amount of driving, and the quality of the tire. The amount of direct sunlight a tire gets while parked, the type of terrain it drives on, and the condition of the road can also play a role in a tire’s lifespan. The heat and humidity in Florida can accelerate the breakdown of rubber in a tire, resulting in a shorter lifespan. The amount of driving also affects a tire, as the more miles driven, the quicker a tire will wear down. Tires with higher treadwear ratings and better materials will last longer in Florida’s heat and humidity.

To maximise the life of a tire in Florida, it is important to purchase a tire with a good treadwear rating, and to regularly check your tire pressure, alignment, and tread depth. You should also rotate your tires every 7,500-10,000 miles. When it is time to replace your tires, it is important to do so quickly, as driving on worn tires can be dangerous. Signs that it is time to replace your tires include balding, cracking, bulging, or uneven tread wear.

How to tell when your tires need to be replaced

is an important question for all drivers living in hot and humid climates like Florida. Heat and humidity in Florida can accelerate the deterioration of rubber in tires. This means that tires may need to be replaced more often than in other climates. The amount of driving also affects a tire’s lifespan. The more miles driven, the more quickly the tire will wear down. Moreover, the quality of the tire itself can also play a role in how long it lasts. Tires with higher treadwear ratings and higher-quality materials will last longer in Florida’s heat and humidity.

To maximise the life of a tire in Florida, it is important to purchase a tire with a good treadwear rating and to regularly check your tire pressure, alignment, and tread depth. It is also important to rotate your tires every 7,500-10,000 miles. When it is time to replace your tires, it is important to do so quickly, as driving on worn tires can be dangerous. Signs that it is time to replace your tires include balding, cracking, bulging, or unevenly-worn treads. If your tires show any of these signs, it is important to replace your tires as soon as possible to ensure your safety on the road.

Maintenance tips to extend the life of your tires

in Florida can be found easily. One of the most important tips is to purchase a tire with a good treadwear rating. Tires with higher treadwear ratings and higher-quality materials will last longer in Florida’s heat and humidity. Additionally, regularly checking your tire pressure, alignment, and tread depth is also important. Fluctuations in these factors can cause your tires to wear out faster.This will ensure even wear on all four tires, extending their life. When it is time to replace your tires, it is important to do so quickly, as driving on worn tires can be dangerous. Signs that it is time to replace your tires include balding, cracking, bulging, or unevenly-worn treads.Being aware of these tips and ensuring that your tires have regular maintenance is an important part of ensuring your safety when you are on the road.

Best types of tires for Florida weather

is an important question to ask. In the heat and humidity of Florida, having tires with higher treadwear ratings and higher-quality materials will last longer. Regularly checking your tire pressure, alignment, and tread depth is also important for Florida drivers. Fluctuations in these factors can cause your tires to wear out more quickly. Additionally, ensuring even wear on all four tires can extend their life. Different types of tires are designed for different needs and conditions, so it is important to choose the right tires for the right conditions. 

If you live in Florida, you should look for tires that are designed for hot climates, as this will help them last longer and perform better in the Florida heat and humidity. You should also make sure that you are rotating your tires regularly to ensure even wear. Being aware of these tips and ensuring that your tires have regular maintenance is an important part of ensuring your safety when you are on the road.

The importance of regular tire rotations

should not be overlooked, especially in the heat and humidity of Florida. Tire rotations can help you to extend the life of your tires and keep them performing optimally. Having tires with higher treadwear ratings and higher-quality materials is key for getting the most out of them. Additionally, checking your tire pressure, alignment, and tread depth is important for Florida drivers, as fluctuations in these factors can cause your tires to wear out quicker.

It is important to ensure your tires have regular maintenance and that you are aware of the importance of regular tire rotations. Being cognizant of these tips will help to ensure your safety when you are on the road. Regular tire rotations can be done at any reputable tire shop. They can check for wear and tear on the tire and rotate them as needed. Keeping your tires in good condition is essential for preserving their life and performance.

Common signs of tire wear and tear

include reduced tread depth, uneven wear, bald spots, cracks, bulges, and sidewall damage. It is important to check your tires regularly for any of these signs, as they can indicate a need for tire replacement or repair. Additionally, it is important to pay attention to the overall appearance of your tires, especially if you have been driving on rough terrain. You should also check for any signs of irregular wear, as this could indicate a misalignment in your wheels or suspension. It is also important to check your tire pressure regularly, as tire pressure that is too low or too high can cause uneven wear and reduce the life of your tires. If the tire pressure is off, make sure you fill up your tires to the manufacturer’s recommended levels. Regular maintenance, such as tire rotations, will also help reduce any uneven wear and keep your tires in the best possible condition. Taking regular care of your tires is essential for preserving their life and performance.

How to find the right tires for your vehicle

is an important question for any vehicle owner. There are several factors to consider when selecting the right tires for your vehicle. One of the most important factors is the type of vehicle you have. Depending on your type of vehicle, you may need tires with specific features such as all-season or mud tires. 

Additionally, the terrain you will be driving on is also an important factor in selecting the right tires for your vehicle. If you are driving off-road, you may need more aggressive tread patterns to provide better traction. Other factors to consider when selecting tires include the type of driving you will be doing, such as highway, city, or off-road driving. Additionally, you should consider the climate you will be driving in and make sure that the tires you choose have the correct tread pattern for the type of conditions you will be driving in. 

Finally, you should make sure to select tires with the right load rating, as improperly rated tires can cause problems on the road. Taking the time to select the right tires for your vehicle can help you save money in the long run and ensure that your vehicle is always performing at its best.

Conclusion

In conclusion, the life of your tires depends on a number of factors, including how much you drive, the terrain, your driving habits, and the quality of the tires. If you live in Florida and drive on a regular basis, you should expect your tires to last up to 50,000 miles. However, if you drive on more challenging terrain, your tires may need to be replaced sooner. Regularly check your tires for wear and tear, and make sure to rotate your tires every 5,000 to 10,000 miles to ensure that your tires wear evenly. If you have any questions about the life of your tires or need help determining when to replace them, contact a tire specialist for assistance.

Frequently Asked Questions

How long do tires last in Florida?

Tires typically last between 30,000 and 50,000 miles in Florida, depending on the type of tire and how well they are maintained.

What should I consider when choosing tires for Florida?

You should consider the type of terrain you will be driving on, the climate in your area, the amount of wear and tear the tires will receive, and the type of vehicle you drive.

What can I do to extend the life of my tires?

To extend the life of your tires, make sure to maintain proper air pressure, rotate the tires regularly, and check for signs of wear and tear.

What type of tires are best for Florida?

All-season tires are typically the best choice for Florida, as they are designed to handle a variety of driving conditions.

What should I do if I get a flat tire?

If you get a flat tire, you should immediately replace it with a spare tire or contact roadside assistance for help

What should I do if I notice my tires are wearing unevenly?

If you notice your tires are wearing unevenly, you should have your tires checked by a professional and rotated as needed.

How to Change ATV Tires

Changing the tires on your ATV can seem like a daunting task, but it doesn’t have to be. With the right tools, some basic knowledge, and a bit of patience, you can easily replace your ATV tires yourself. This guide will walk you through the process step-by-step, from removing the old tires to installing the new ones. We’ll also discuss the different types of ATV tires and how to choose the right ones for your vehicle. Ready to get started? Let’s go!

Research the type of tire that is best for your ATV

Before you start replacing your ATV tires, you should first consider the type that you need. ATV tires come in different types, each designed to meet the needs of different types of ATV owners. Mud tires offer the most grip in sloppy terrain, making them popular among off-roaders and racers. Sand tires are designed to offer maximum traction in sand and other loose surfaces. All terrain tires are a good choice for general off-road use and offer a good balance of traction and durability. Street tires are great for street-legal ATVs and provide better handling and stopping power on paved surfaces. Identify the terrain you plan to ride most often and then choose the appropriate tire type for your vehicle.

Gather the necessary tools and supplies for changing the tires

Make sure you have a jack, socket wrench set, tire iron, and lug nuts before beginning the installation process. You may also need a tire and wheel alignment gauge to measure the wheel size and tire diameter. Additionally, have a digital tire pressure gauge on hand to check the tire pressure after the installation. If you plan to use a power tool, such as an air wrench, make sure you use safety goggles and noise-reducing ear protection. These tools will come in handy when loosening lug nuts and bolts.

Also, have a few rags to clean up any grease or dirt that may get on the tires during the installation. Finally, make sure to have a tire inflator and a few cans of air pressure spray on hand to make sure that the pressure in the tires is correct once they are mounted on the ATV. All of the tools and supplies listed here will help to make the wheel and tire installation process easier and more efficient.

Remove the old tires and replace them with the new ones

To begin, make sure that the vehicle is parked in the correct position, and that the tires are properly inflated. Use a tire iron and a socket wrench to remove the lug nuts that attach the wheel to the ATV. Once the lug nuts are off, lift the wheel off the ground and carefully pull it away from the ATV. Place the wheel to the side and move on to the next tire. Repeat the process for the remaining tires.

Once the tires are off, inspect the rim and look for any damage or wear. If the rim is in good condition, it will be ready for the new tires. Once the rim is ready, line up the tires with the rim and push them onto the rim. Be sure to check the alignment of the tire as you push it onto the rim.

Check the tire pressure and adjust if necessary 

to ensure your safety when driving your ATV. First, you will need to remove the wheel from the ATV and check for any damage to the rim. If the rim is cracked or broken, you will need to replace it before you can install the tires. Once the rim is ready, line up the tires with the rim and push them on. Make sure to check the alignment of the tire as you push it onto the rim. Once the tires are in place, use a tire iron and a digital tire pressure gauge to check the pressure of the tires.

If the pressure is too low, use a tire inflator and cans of air pressure spray to add air until the pressure reaches the manufacturer’s recommended level. Place the wheel back onto the ATV and tighten the lug nuts with the socket wrench. Again, use the tire iron and digital tire pressure gauge to check the tire pressure. Make sure to add air or let some air out until the pressure of the tire is correct. Once the pressure is correct, you can start enjoying your ATV with the new tires.

Reattach the wheel and torque the lug nuts to the manufacturer’s specifications

to ensure the safety of your ATV. Before you attach the wheel, make sure to check the alignment of the tire as you push it onto the rim. After you have the wheel in place, use a tire iron and a digital tire pressure gauge to check the pressure of the tires. If they are too low, use a tire inflator and cans of air pressure spray to add air in the tires until the pressure reaches the manufacturer’s recommended level. Once the tire pressure is correct, use a socket wrench to re-attach the wheel and then begin to torque the lug nuts to the manufacturer’s specifications. Again, use the tire iron and digital tire pressure gauge to check the tire pressure. Make sure to add air or let some air out until the pressure of the tire is correct. Once the pressure is correct, your ATV is safe to ride. Enjoy your ATV with your new tires and always make sure the lug nuts are tightened to the manufacturer’s specifications.

Test the ATV for proper operation

before you take off on your ride. Start by checking the alignment of the tire as you push it onto the rim and use a tire iron and a digital tire pressure gauge to check the pressure of the tires. If they are too low, use a tire inflator and cans of air pressure spray to add air in the tires until the pressure reaches the manufacturer’s recommended level. Once the tire pressure is correct, use a socket wrench to re-attach the wheel and then begin to torque the lug nuts to the manufacturer’s specifications.

After you have the wheel in place, visually inspect the ATV’s frame, suspension system, brakes, and drivetrain. Make sure that all of these components are secured properly and that no worn or broken parts need replacing or adjusting. Next, check the spark plug and clean the air filter. Make sure to look for any cracking and bulging, as this can be a sign of an uneven tire pressure. Finally, start the ATV and let it run for a few minutes.

Check for any strange noises that may indicate a problem and make sure the ATV is running smoothly and efficiently. Once everything is in order, your ATV is ready to take you on your next adventure.

Conclusion

In conclusion, changing ATV tires is a relatively straightforward process as long as you have the right tools and take your time. It’s important to remember to be careful and use common sense when working with hazardous materials such as gasoline and oil. Make sure to follow the manufacturer’s instructions when removing and installing the tires. This will ensure the best results and prevent any damage to your ATV.

Frequently Asked Questions

What tools do I need to change ATV tires?

You will need a tire iron, a jack, and a tire gauge. You may also need a wheel chock, depending on the type of ATV you have.

How do I remove the old tire?

Start by loosening the lug nuts with the tire iron. Then, jack up the ATV and remove the lug nuts and the tire.

How do I install the new tire?

Place the new tire on the wheel and put the lug nuts back on.

What is the best way to inflate the tire?

Use a tire gauge to check the tire pressure and make sure that it is at the correct level. Use an air compressor or a tire inflator to inflate the tire.

Do I need to balance the tire?

Yes, you should balance the tire. This will help the ATV to run more smoothly and reduce vibrations.

How often should I check the tire pressure?

You should check the tire pressure every time you ride your ATV. If the pressure is too low, it can cause the tire to wear down faster and reduce your ATV’s performance.

What do I do if I get a flat tire?

If you get a flat tire, you should replace it right away. Make sure to carry a spare tire and the tools you need to change it.

What safety precautions should I take when changing ATV tires?

Make sure to wear protective clothing when changing ATV tires. Also, make sure that the area is clear of debris and that the jack is stable before you jack up the ATV.

how to clean outdoor furniture covers

Keeping your outdoor furniture covers clean is essential for maintaining their look and prolonging their life. But with all the dirt, pollen, and other debris that accumulates on them, it can be a challenge to keep them looking their best. Whether you’re dealing with a chair cover, a table cover, or some other type of outdoor furniture cover, this guide will show you how to clean them quickly and easily. We’ll cover the best cleaning methods, along with tips for removing tough stains and mildew. Let’s get started!

Identify the Material of the Furniture Cover

Before cleaning, This is important as certain materials can be damaged by certain cleaning products. Most outdoor furniture covers are made from nylon or polyester. You should avoid using bleach or any other strong cleaning products on these materials. 

Instead, use a mild detergent to clean these materials. For tougher stains, you may need a more specialised cleaner depending on the material. You should also identify if the covers contain any special coatings or finishes that may be damaged by strong cleaning products. Once you’ve identified the material of the covers, you can use the appropriate cleaning method to thoroughly clean them. 

In addition, you should always read the care instructions on the furniture cover’s label, as these instructions should provide you with the best methods for cleaning the material.

Gather the Right Cleaning Supplies

Before you begin cleaning your outdoor furniture covers, there are some important steps to take. First, you should identify the material of the covers. It is important to know the material of the covers before you begin to clean them, as different materials can be damaged by different cleaning products. Once you’ve identified the material of the covers, you can then gather the right cleaning supplies.

For nylon or polyester covers, you should use a mild detergent and warm water to spot clean. For tougher stains, you may need a more specialised cleaner depending on the material of the covers. You should also identify if the covers contain any special coatings or finishes that might be damaged by strong cleaning products. To be safe, it is best to read the care instructions on the furniture cover’s label, as these instructions should provide you with the best methods for cleaning the material. Finally, once you’ve identified the material of the cover and gathered the appropriate cleaning supplies, you can begin the cleaning process.

Prepare the Furniture Cover for Cleaning

To ensure the best results when cleaning a furniture cover, you should start by preparing the cover for cleaning. First, it is important to know the material of the covers. Different materials may respond differently to certain cleaning products, so identifying the material will help you ensure that you don’t damage the cover while cleaning it. 

Once you’ve identified the material of the covers, you can then gather the right cleaning supplies. For nylon or polyester covers, you should use a mild detergent and warm water to spot clean. For tougher stains, you may need a more specialised cleaner depending on the material of the covers. You should also identify if the covers contain any special coatings or finishes that might be damaged by strong cleaning products. 

To be safe, it is best to read the care instructions on the furniture cover’s label, as these instructions should provide you with the best methods for cleaning the material. Finally, once you’ve identified the material of the cover and gathered the appropriate cleaning supplies, you can begin the cleaning process.

Remove Stains and Mildew

Once the cover is prepped, you can then use the cleaning solution of your choice to remove any stains or mildew. For tough stains and mildew, you may need to apply the solution several times before the stain disappears. Moreover, for tougher stains and mildew, you may need to use a more specialised cleaner. Once the cleaning is complete, make sure you rinse the cover with water and let it air dry before using the cover again.

Clean the Furniture Cover

to keep it looking its best. It is important to identify the material of the cover before you begin the cleaning process. Read the care instructions on the label to determine the best methods for cleaning the material. You may need a more specialised cleaner for tougher stains, depending on the material of the cover. Be sure to check for special coatings or finishes on the cover, as strong cleaning products could damage these.

Once you have determined the material of the cover and gathered the appropriate cleaning supplies, you can begin the cleaning process. Apply the cleaning solution of your choice to remove any stains or mildew. For tougher stains and mildew, you may need to apply the solution several times before the stain disappears. Finally, make sure to rinse the cover with water and let it air dry before using the cover again.

Rinse the Furniture Cover

properly to ensure that it is clean and free from dirt and any other contaminants. First, you must identify the material of the cover and check the care instructions to determine the best methods for cleaning the material. Depending on the material, you might need a more specialised cleaner, or a stronger cleaning product for tougher stains. Make sure to also check for any special coatings or finishes on the cover, as strong cleaning products could damage these. Apply the cleaning solution of your choice to the cover, and if necessary, repeat the process multiple times for tougher stains and mildew. Once you have done that, rinse the cover with water and let it air dry before using the cover again. Doing this regularly will help you maintain your furniture covers and keep them looking great for a longer period of time.

Dry the Furniture Cover

Once you have done that, rinse the cover with water and let it air dry before using the cover again. Allow the cover to dry completely in a warm, dry place. You can use a fan to speed up the process. Once the cover is dry, check it for any remaining stains, and if necessary, apply the cleaning solution once more and repeat the rinsing and drying process. Doing this regularly will help you maintain your furniture covers and keep them looking great for a longer period of time.

Store the Furniture Cover Properly

After you have dried the furniture cover, make sure to store it properly. Place the furniture cover in a dry place away from direct sunlight and moisture. Make sure that the cover is properly folded so that it will fit the area you are storing it in. You should also hang the cover on a coat hanger to make sure it maintains its shape. Doing this regularly will help you maintain your furniture covers and keep them looking great for a longer period of time. Not only that, storing the furniture covers properly is essential for them to last longer and not become damaged due to rain, sun or other external elements. By taking good care of your furniture covers, you can enjoy them for years to come.

Conclusion

In conclusion, cleaning outdoor furniture covers can be a daunting task. The key to success is to ensure you use the right cleaning products and techniques to get the job done. Start by removing any dirt or debris from the fabric, then use a mild detergent and a soft brush to gently scrub away any stains. Finally, rinse off the fabric with clean water and let it air dry. With these tips, you can keep your outdoor furniture looking like new for years to come.

Frequently Asked Questions

How can I remove dirt and grime from my outdoor furniture covers?

You can use a mild detergent and a soft brush to remove dirt and grime from your outdoor furniture covers. You can also use a vacuum cleaner with a soft brush attachment to get in between the creases of the fabric.

How often should I clean my outdoor furniture covers?

It is recommended to clean your outdoor furniture covers at least twice a year, or more often if they are exposed to harsh weather conditions

What is the best way to remove mold and mildew from my furniture covers?

The best way to remove mold and mildew is to use a mixture of one part bleach and three parts water. Make sure to scrub the cover with the solution and rinse it thoroughly.

What can I do to protect my furniture covers from the sun and rain?

To protect your furniture covers from the sun and rain, you can use a waterproof cover or an outdoor furniture cover. These covers will help to protect your furniture covers from UV rays and moisture.

What should I do if my furniture cover gets stained?

If your furniture cover gets stained, you can use a mild detergent and a soft brush to remove the stain. If the stain persists, you can use a spot cleaner or a mild bleach solution.

What is the best way to store my furniture covers in the winter?

The best way to store your furniture covers in the winter is to hang them in a dry place. Make sure that they are not exposed to moisture or direct sunlight

Are there any special tips for cleaning outdoor furniture covers?

Yes, it is important to use a mild detergent and a soft brush when cleaning outdoor furniture covers. It is also important to avoid using harsh chemicals, as they can damage the fabric.

How to ship antique furniture

Shipping antique furniture can be a difficult and complex process, but with the right preparation and knowledge, it can be done safely and securely. In this post, we’ll discuss the best practices for shipping antique furniture, including how to properly package, transport, and insure your valuable items. We’ll also provide tips on how to choose the right shipping company and ensure your items arrive in the same condition they left in. Armed with this knowledge, you’ll be able to safely ship your antique furniture with confidence.

Measure and Weigh the Item

Before you ship an antique item, it’s important to measure and weigh it. Knowing the size and weight of the item will help you determine the size and type of the shipping container you need. If the item is too large for standard shipping, you may need to hire a specialized moving company. Be sure to take photographs of the item before you start packaging the item, as this will help you in the event of damages during shipping.

Check with the shipping company for their guidance on what measurements to take and how to properly pack the item. Measure the item from all angles, making sure to account for any protrusions or projections. Weigh the item and record the exact weight in order to get an accurate estimate of the shipping cost.

Prepare the furniture for shipping

by making sure it is well-protected and secure. Begin by cleaning and inspecting the item for any dirt or damage that will need to be repaired before it is shipped. You may want to use wax or a wood finish to ensure the furniture is properly sealed against moisture and dust. Once the item is clean and inspected, wrap it with bubble wrap or other suitable protective material.

You will also need to secure the item with strong packing tape or straps so that it does not shift or move during shipping. You can also add extra cushioning such as foam or cardboard to ensure that the item is adequately protected during transit. Additionally, make sure to mark the box with a “Fragile” sticker to alert the carrier to handle the item with care. Finally, verify that the item is secure and ready to be shipped. Following these steps will help you ensure that your antique furniture is properly protected while in transit.

Pack the Furniture Securely

Packing furniture can be a tricky task, especially if it’s old and delicate. To ensure your furniture arrives safely, take the time to properly clean and prepare the item before packing it. First, use a soft cloth and a wax or wood finish to make sure the item is sealed against moisture and dust. This will help keep it in good condition while in transit and once it arrives. Once it is clean and inspected, be sure to wrap the item in bubble wrap or some other type of protective material. Make sure to tightly seal the edges and corners, and then secure the item with strong packing tape or straps.

Additionally, you may want to add extra cushioning such as foam or cardboard to further protect the item while it is in transit.Be sure to mark the box as “fragile” to alert the carrier to handling. Finally, verify that the item is properly secured and protected before sending it off. By following these steps, you can help guarantee that your antique furniture is taken care of during transit and arrives in the same condition it left in.

Select an Appropriate Shipping Method

for your Antique Furniture. Once you have properly prepared the item, the next step is to choose the right shipping method for it. Depending on the size and weight of the item, as well as the distance it needs to travel, your best option may be to use a shipping service such as FedEx, UPS, or USPS. They offer a variety of services to provide protection for fragile or valuable items that may be expensive to replace. With these services, you can choose the service that best fits your needs and budget. If the item is smaller, you may choose to mail it with Priority Mail or Express Mail, which offers additional cushioning and protection.

If you choose to use a freight carrier to send bulky items or items that are too large for Priority or Express Mail, make sure to select a reputable company that understands the importance of handling fragile items with care. Be sure to get an estimate on shipping costs from the carrier before committing to the order. Once you have selected the shipping method, make sure to properly pack the item to ensure it arrives in the same condition.

Insure the furniture during shipping

to protect against any damage or loss during the transit of your items. Shipping insurance can help protect you from unexpected costs that may be incurred if your furniture is damaged or lost in transit. Many shipping companies offer a range of insurance services including transit insurance and other protection services. Transit insurance is a cost-effective way to guard against basic damages that may occur during the shipping process. Other protection services may be available such as coverage for expensive furniture or items that are highly breakable and expensive to replace. 

Make sure to inquire about the services and coverage that the shipping company offers before you make any decisions. If you are utilizing a freight company, take the time to research the reputation of the company. This will help you to make sure that they are handling your items with care. Get an estimate of the shipping costs before making any commitments and plan your budget accordingly. Properly packing items of any size is important to make sure that they arrive in the same condition that they were sent. Finally, insure the furniture during shipping to cover any extra costs that may be needed if any damage occurs.

conclusion

In conclusion, shipping antique furniture can be a daunting task. It requires careful planning and knowledge of the proper packing materials and techniques to ensure that your furniture arrives safely. It is important to take the time to research the best shipping options for your furniture, as well as the most effective packing materials and techniques to protect it during transport. With the right planning and preparation, you can ensure that your furniture will arrive in perfect condition.

Frequently Asked Questions

What is the best way to ship antique furniture?

The best way to ship antique furniture is to use a professional packing and shipping service. They can provide the right packing materials and techniques to ensure the furniture is protected during shipment.

What type of packing materials should I use?

You should use bubble wrap, packing peanuts, and foam to protect the furniture. You should also use a strong cardboard or wooden box to ensure that the furniture is secure during shipment.

How much does it cost to ship antique furniture?

The cost of shipping antique furniture depends on the size and weight of the furniture, as well as the distance it needs to be shipped.

What are the special considerations for shipping antique furniture?

Special consideration should be taken when packing and shipping antique furniture. Make sure to use the right packing materials and shipping techniques to ensure the furniture is not damaged during shipment.

Is it better to ship antique furniture via air or ground?

It is usually better to ship antique furniture via ground because it is more cost-effective. However, if the furniture needs to be shipped quickly, air shipping may be the better option.

What is the best way to track the shipment of antique furniture?

You can use a tracking number to track the shipment of antique furniture. This number will be provided when you book the shipment.

Is it possible to insure antique furniture during shipment?

Yes, it is possible to insure antique furniture during shipment.

What do I need to do to prepare antique furniture for shipment?

You should make sure to properly clean and pack the furniture before shipment. You should also make sure to use the right packing materials and techniques to ensure the furniture is secure during shipment.

Why does my makeup crack?

Have you ever applied makeup only to have it crack and look uneven? If so, you’re not alone! This is a common problem that many makeup wearers experience, and it has a variety of causes. In this post, we’ll explore the most common reasons why your makeup might be cracking and provide some tips on how to prevent it from happening. We’ll also discuss how to repair your makeup if it does crack, so you can get back to looking your best. Let’s get started!

Identify the Cause of Your Makeup Cracking

is a common dilemma that many makeup wearers face. The most common causes of cracking makeup can range from skin type to using the wrong product. If you have oily skin, then your makeup is more likely to crack because the oil seeps through and separates the makeup layers. Using a product that is too heavy for your skin type can also cause makeup to crack as it may not be able to blend into your skin well. In addition, if you are using makeup that is too old, this can also cause your makeup to crack more easily due to the product not being properly hydrated. Lastly, applying too much makeup or not blending it in properly can also cause cracking.

In order to prevent cracking, use the right makeup for your skin type and always be sure to use a moisturising primer before applying your makeup. Additionally, if you are using a product that is very pigmented, start by applying a small amount and then go in for more if needed. Finally, when applying your makeup, be sure to blend it into your skin and use a makeup brush or sponge to help ensure even coverage.

Identifying the cause of your makeup cracking can help you to avoid this problem in the future. Keep these tips in mind and you will be sure to look your best.

Check the Quality of Your Products

to avoid makeup from cracking. Using the wrong type of product can lead to makeup cracking, and this can be quite a bothersome problem for many women. Properly researching and using the right products for your skin type is essential for great makeup results.

Using a product that is too heavy for your skin type can also cause makeup to crack as it may not be able to blend into your skin well. In addition, if you are using makeup that is too old, this can also cause your makeup to crack more easily due to the product not being properly hydrated. Lastly, applying too much makeup or not blending it in properly can also cause cracking. In order to prevent cracking, use the right makeup for your skin type and always be sure to use a moisturising primer before applying your makeup.

Additionally, if you are using a product that is very pigmented, start by applying a small amount and then go in for more if needed. Finally, when applying your makeup, be sure to blend it into your skin and use a makeup brush or sponge to help ensure even coverage. Identifying the cause of your makeup cracking can help you to avoid this problem in the future. Keep these tips in mind and you will be sure to look your best.

Monitor Your Application Technique

– Proper makeup application is key to avoiding cracking. Make sure you are using the right products for your skin type and condition. If you are using a product that is too old, it can lead to cracking. You should also apply the right amount of makeup and be sure to blend it evenly into your skin for the best results. Additionally, use a moisturising primer to help hydrate the product before you begin.

If the product is very pigmented, start with a small amount and then build coverage as needed. Finally, make sure you are using the right tools to blend in your makeup, such as a brush or sponge. This will help ensure even coverage and help reduce the chance of cracking. Paying attention to your application technique can go a long way in preventing makeup from cracking.

Use Primer to Help Set Your Makeup

When applying makeup, it is important to use the right products and techniques to ensure the best results. Make sure you are using the right products for your skin type and condition. If you are using a product that is too old, it can lead to cracking. Additionally, use a moisturising primer to help hydrate the product before you begin. 

If the product you are using is very pigmented, start with a small amount and then build coverage as needed. To blend the makeup in evenly, make sure you have the right tools to apply the makeup, such as a brush or sponge. By taking the time to pay attention to your application technique, you will help prevent your makeup from cracking or wearing off.

Invest in Quality Makeup Brushes 

to ensure that your makeup looks flawless and lasts all day. Quality makeup brushes will help you get the best application every time. Choose brushes with soft bristles that won’t scratch or irritate your skin. Make sure you thoroughly clean your brushes after each use to prevent bacteria from building up. Natural bristles tend to be the best choice for powder makeup, as they provide better coverage.

Synthetic bristles are best for liquid and cream products because they won’t absorb as much product. When applying your makeup, make sure to blend it in with even strokes and circles. Doing this will help prevent makeup from cracking or caking. Taking the time to invest in quality makeup brushes will help you get the look you want without risking damage to your skin.

Moisturise Your Skin Regularly

Taking care of your skin is essential to prevent dryness and wrinkles from forming. Make sure to use a moisturiser every day, especially after washing your face or taking a bath. You can use a cleanser and toner to help your skin stay clean and clear, but moisturising is a must. Moisturisers help to lock in moisture so your skin is better protected from the elements. Choose a moisturiser that is made for your skin type, whether it’s oily, dry, or combination. Natural moisturisers such as almond oil or cocoa butter are excellent for nourishing the skin.

It’s also important to use sunscreen to prevent premature ageing. Make sure to apply sunscreen at least 15 minutes before you leave the house and reapply every two hours to keep your skin safe from the sun’s harmful rays.

Avoid Touching Your Face Throughout the Day

It is important to avoid touching your face throughout the day. The oils and bacteria on your hands can cause breakouts and irritation. Investing in quality makeup brushes can help you to get the look you want without risking damage to your skin.

Makeup brushes can help you to create a perfect look while also keeping your hands away from your face. Moisturise Your Skin Regularly: Taking care of your skin is essential to prevent dryness and wrinkles from forming. Make sure to use a moisturiser every day, especially after washing your face or taking a bath. Choose a moisturiser that is made for your skin type, whether it is oily, dry or combination. Natural moisturisers such as almond oil or cocoa butter are excellent for nourishing the skin. It’s also important to use sunscreen to prevent premature ageing.

Make sure to apply sunscreen at least 15 minutes before you leave the house and reapply every two hours to keep your skin safe from the sun’s harmful rays. Keeping your skin moisturised and protected is key to maintaining healthy, youthful looking skin. Avoid touching your face throughout the day and practise good skincare habits to keep your skin looking and feeling its best.

Choose the Right Foundation for Your Skin 

Whether you want a natural look or full coverage, it’s important to choose the right foundation for your skin type. This will ensure that your skin looks flawless all day long. If you have oily skin, look for a matte foundation that helps keep your skin shine-free. For dry skin, choose a moisturising foundation which will leave your skin looking dewy and hydrated. If you have combination skin, a lightweight and breathable foundation is best. Always make sure to test a few foundations on your skin before making a purchase, as you want one that is comfortable and looks natural.

To ensure the best results from your foundation, make sure to moisturise your skin regularly with a moisturiser specifically made for your skin type. Also, make sure to use sunscreen to protect your skin from the sun’s harmful rays. These steps will help you find the perfect foundation for your skin type and achieve that perfect look for any occasion.

Avoid Products With Alcohol or Fragrance

When shopping for skin care products, look for those that are alcohol-free and fragrance-free. Products with alcohol or fragrances can be harsh and can strip away natural oils, leading to irritation and dryness. Additionally, harsh ingredients can cause redness and can even lead to acne. To prevent these skin issues and ensure that your skin looks its best, it’s always best to avoid products with alcohol or fragrance. There are plenty of skin care products available that are both alcohol-free and fragrance-free.

Additionally, when shopping for makeup, always opt for products that are labelled as “non-comedogenic” or “oil-free.” These products will help to keep your skin looking healthy and free of blemishes. When it comes to achieving flawless skin, avoiding products with alcohol or fragrance is a must.

Set Your Makeup With a Setting Spray or Powder

to Help Achieve an Even Look. Setting your makeup with a setting spray or powder is essential for achieving a long-lasting, flawless look. After you’ve applied your foundation and concealer, using a setting spray or powder is the last step in your makeup routine. Setting sprays and powders help to lock your makeup in place and prevent it from transferring or smudging.

Setting sprays usually come in a spray bottle and can be applied to your face with a few quick sprays. On the other hand, setting powders come in a small container and can be applied with a makeup brush. Setting sprays and powders come in a variety of formulas, so you can choose one that best suits your skin type. Additionally, setting sprays and powders can help to mattify your skin and create an even look. By setting your makeup with a setting spray or powder, you’ll be able to achieve a long-lasting, flawless look that will last all day.

conclusion

In conclusion, makeup cracking can be caused by a variety of factors, including improper application, poor skin care, and using products that are not suitable for your skin type. To avoid makeup cracking, make sure to use the right primer and moisturiser to prep your skin, use the right foundation and powder, and make sure to set your makeup with a setting spray. Additionally, it’s important to remember to use makeup remover to clean your face before bed, and to keep your makeup brushes clean to avoid clogging your pores. By following these tips, you can help keep your makeup looking fresh and prevent it from cracking.

Frequently Asked Questions

What causes my makeup to crack?

Generally, it is caused by applying too much makeup or not using the right products. If you are using too much makeup, it can cause the makeup to dry too quickly and crack. Also, if you are using the wrong products, they can cause your makeup to crack.

What can I do to prevent my makeup from cracking?

The best way to prevent your makeup from cracking is to use the right products and apply the makeup in thin layers. 

Are there any products that can help keep my makeup from cracking?

Yes, there are products that can help. Look for makeup that contains ingredients like hyaluronic acid, glycerin, and vitamin E. These ingredients will help keep your makeup in place.

Is there a way to fix cracked makeup?

Yes, there are ways to fix cracked makeup. Start by gently exfoliating your skin and then apply a moisturiser. You can also try using a setting spray or powder to help keep your makeup from cracking.

What are some tips for avoiding cracked makeup?

Make sure to use the right products and apply them in thin layers. Start with a moisturiser and use a primer before applying your foundation. Also, try using setting sprays or powders to help keep your makeup in place.

How to clean my dagne dover bag

If you have a Dagne Dover bag, you know how great it looks and how long it can last. However, it’s important to clean your bag regularly to keep it looking its best. Cleaning your Dagne Dover bag is easy and can be done with a few simple steps. Follow these instructions to learn how to clean your Dagne Dover bag and keep it looking like new.

Identify the type of fabric

used to make your Dagne Dover bag before you start cleaning it. Different fabrics require different cleaning methods. Knowing the type of material will help you find the right cleaning solution. Most Dagne Dover bags are made with durable materials that can usually be hand washed. Gather the necessary cleaning supplies.

You will need a few items to clean your Dagne Dover bag properly. These include a soft-bristled brush or toothbrush, a mild detergent, a damp cloth, and a water-resistant spray. Make sure you have all the supplies ready before you start. Prepare the bag for cleaning. Empty out the bag and remove anything that can be taken out.

If there are any pockets with zippers, unzip them first. This will make it easier to access the corners and crevices. Clean the exterior of the bag. Start by brushing off any dirt and debris with a soft-bristled brush or toothbrush. Then, wipe down the bag with a damp cloth. Add a few drops of mild detergent if there are any stubborn stains.

Wipe the bag until all the dirt is gone and the detergent is removed. Clean the interior of the bag. Once the exterior is clean, move to the interior of the bag. Use the same cleaning method as before and make sure to get into all the nooks and crannies. Take special care when cleaning around zippers and other hardware. Dry the bag. Once the bag is completely clean, let it air dry. Avoid using a dryer as this can damage the fabrics.

Make sure the bag is completely dry before moving on to the next step. Reapply waterproofing. Once the bag is dry, it’s important to reapply a water-resistant spray. This will help keep the fabric protected from moisture and stains. Follow the instructions on the spray bottle for best results.

Remove excess dirt

before you start cleaning the bag. Shake the bag to remove any dirt or debris that is loose. If you see any areas with stains or dirt that is embedded, use a soft brush or a wet cloth to gently lift the dirt. If necessary, use a mild detergent on the cloth or brush to help remove tough stains. Work in small areas and make sure to rinse the cloth or brush regularly throughout the entire process.

After scrubbing lightly, rinse the bag with water, then let the bag air dry. Once the bag is completely dry, it’s time to reapply a water-resistant spray. This will help keep the bag protected from moisture and stains.

Follow the instructions closely to ensure that you are applying the product correctly. Once the product has been applied, let the bag air dry again to ensure that the product has been completely absorbed. This way you can be sure that your bag is free from dirt and stains.

Pre-treat with a spot cleaner

is an important step to help keep your bag clean and protected. First, spot clean the bag with a mild detergent and a soft brush. Use a cloth or paper towel to apply the detergent and work in a circular motion to remove dirt and grime. Make sure the manufacturer’s instructions are correct. Once the bag is clean, rinse it with water and let it air dry.

Once the bag is dry, you can reapply a water-resistant spray. This will help keep the bag secure. Read the instructions on the bottle carefully and follow the instructions closely to ensure that the product is applied correctly. Allow the bag to air dry again to make sure that the product has been absorbed completely.

Hand wash or machine wash 

Washing your bags can be a tricky question to answer. Generally, if the bag is made from delicate materials like silk and linen, then hand washing is the best option. For more rugged materials like cotton and canvas, then machine washing is an option. It is important to note that you should always consult the manufacturer’s instructions before washing your bag as they will often list the best method of cleaning.

Additionally, with hand washing, be sure to use a mild detergent and warm water. Once the bag is clean, rinse it with water and let it air dry. Once the bag is dry, you can reapply a water-resistant spray. Read the instructions on the bottle carefully and follow the instructions closely to ensure that the product is applied correctly. Allow the bag to air dry again to make sure that the product has been absorbed completely. This way you can be sure that your bag is free from dirt and stains.

Air dry or tumble dry

is an important question when it comes to cleaning your reusable bag. After rinsing, you can choose to air dry or use a dryer. Air drying is the preferable choice as it helps preserve the fabric quality and colors. On the other hand, using a dryer could shrink or otherwise damage the fabric of your bag. After the bag is dry, you can apply a water-resistant spray to keep your bag protected from moisture and stains.

Make sure to read the instructions on the bottle carefully and follow the instructions closely for successful application. Allow the bag to air dry again to make sure that the product is fully absorbed. By following these steps, you can keep your reusable bag looking and functioning like new for longer.

Condition the leather with a leather conditioner

to help keep it from drying out and cracking. You should apply the conditioner to the leather using a soft cloth in a circular motion. Make sure to apply the conditioner evenly, and don’t forget to use a leather conditioner on the straps and other leather parts of the bag. After the application of the leather conditioner, allow the bag to air dry. Avoid drying it with a dryer as it could cause damage to the leather. If the leather is dry, you should apply a sealant against moisture. You should also make sure to condition the leather on a regular basis, depending on the frequency of use. Proper conditioning will ensure that the leather in your bag stays strong and flexible for years to come.

conclusion

In conclusion, cleaning your Dagne Dover bag is relatively easy. All it requires is a gentle cleaning solution and a soft cloth. To get the best results, make sure you use a cleaning solution that’s specifically designed for leather and canvas materials. You can also use a mild soap and water if you don’t have a cleaning solution. After cleaning, it’s important to condition your bag with a leather conditioner to keep it from drying out and cracking.

Frequently Asked Questions

What is the best way to clean my Dagne Dover bag?

The best way to clean your Dagne Dover bag is to spot clean it with a damp cloth and a mild detergent. You can also use a soft brush to gently remove any dirt or dust.

Can I machine wash my bag?

No, you should not machine wash your bag. This could damage the fabric and the hardware.

Is there any special care I should take when cleaning my bag?

Yes, it’s best to avoid using any harsh chemicals or abrasive materials when cleaning your bag.

What should I do if I have a stain on my bag?

If you have a stain on your bag, you can try spot-cleaning it with a damp cloth and a mild detergent.

How do I remove dirt and dust from my bag?

You can use a soft brush to gently remove any dirt or dust. You can also use a vacuum cleaner with a brush attachment to get into the nooks and crannies.

How do I store my bag when not in use?

When you’re not using your bag, it’s best to store it in a cool, dry place. You can also use a dust bag to protect it from dust and dirt.

What should I do if my bag gets wet?

If your bag gets wet, you should dry it as quickly as possible. Avoid using any type of heat source, such as a hair dryer, to avoid damaging the fabric.

How to Ship Skin Care Products

Shipping skin care products requires careful packaging and handling to ensure that they arrive in perfect condition. This blog post will provide you with step-by-step instructions on how to properly ship your skin care products, including the materials you will need and the best practices for packaging and labelling. Whether you are a small business owner or an individual selling homemade skin care products, this guide will help you navigate the shipping process and ensure that your products reach your customers safely and securely. So let’s dive in and learn how to ship skin care products effectively.

Choose the Right Packaging Materials

When it comes to shipping skin care products, it is crucial to choose the right packaging materials to ensure that your products are protected during transit. Here are some key considerations to keep in mind.

Outer Box:

Start by selecting a sturdy and appropriately sized box that can accommodate your skin care products without excessive movement. It is recommended to use a new box or one that is in good condition to provide optimal protection.

Cushioning Material:

To protect your products from any bumps or impacts during transit, it is important to use cushioning materials. Common options include bubble wrap, packing peanuts, or air pillows. These materials will help absorb shock and prevent your products from shifting around.

Inner Containers:

Depending on the nature of your skin care products, you may need to place them in inner containers to prevent leakage or damage. Consider using sealable bags or individual containers for each product to ensure they remain intact during shipping. Additionally, if you are shipping liquids, make sure they are properly sealed to avoid any spills.

Sealants and Tapes:

Use strong adhesive tapes to secure the package and prevent it from opening during transit. Reinforce the seams and edges of the box to provide extra protection. It is recommended to use clear or branded packing tapes for easy identification and a professional appearance.

Labelling:

Proper labelling is crucial for efficient shipping and accurate delivery. Clearly label the package with the recipient’s address, your return address, and any other necessary shipping labels or instructions. Including fragile or handle with care labels can also alert handlers to exercise caution.

By carefully selecting the right packaging materials, you can ensure that your skin care products are well-protected during shipping and arrive in perfect condition. Remember to also consider any specific regulations or guidelines provided by the shipping carrier you choose to ensure compliance and smooth delivery.

Securely Seal the Products

When it comes to sealing your products for shipping, there are a few key considerations to keep in mind. First and foremost, using strong adhesive tapes is crucial to ensure that the package remains securely sealed during transit. Reinforcing the seams and edges of the box with tape can provide extra protection and prevent any potential openings or damage.

It is recommended to use clear or branded packing tapes for easy identification and a professional appearance. This can help both you and the recipient easily recognize the package and handle it properly. Additionally, labelling plays a crucial role in efficient shipping and accurate delivery. It is important to clearly label the package with the recipient’s address, your return address, and any other necessary shipping labels or instructions.

Use Protective Packaging Fillers

to ensure that your products are well-protected during shipping. There are various types of fillers available that can help cushion and secure your items in the package. These fillers act as a barrier between your products and the outer packaging, reducing the risk of damage due to shocks or impacts during transit. When using fillers, it is important to ensure that they are distributed evenly and adequately cover all sides of the product. 

This will help prevent any movement or shifting inside the box, keeping your items safe and secure. Remember to also consider any specific regulations or guidelines provided by the shipping carrier you choose to ensure compliance and smooth delivery. By taking the time to properly secure and protect your products with packaging fillers, you can minimise the risk of damage and ensure customer satisfaction.

Consider Temperature Control

When shipping products, it is important to consider temperature control to ensure that your items remain in optimal condition. Extreme temperatures can have adverse effects on certain products, such as food, cosmetics, and pharmaceuticals. To prevent damage or spoilage, it is crucial to take the necessary precautions.

There are several measures you can take to maintain temperature control during shipping. One option is to use insulated packaging materials, such as thermal bags or boxes, which provide a protective barrier against temperature fluctuations. These materials help to maintain a consistent temperature within the package, keeping your products safe from extreme heat or cold.

Select the Right Shipping Method

Choosing the right shipping method is crucial when it comes to ensuring that your products are delivered safely and in a timely manner. There are a few important things we need to consider in making this decision. Firstly, you need to determine the size and weight of your package. 

Smaller, lighter packages may be suitable for regular mail or standard shipping methods, while larger or heavier items may require freight or specialised shipping options. Additionally, you need to consider the destination of your package. If you are shipping internationally, you will need to choose a method that offers reliable international delivery services. 

Another important factor to consider is the level of security and tracking available with the shipping method. It is crucial to select a method that provides you and your customers with visibility and peace of mind throughout the delivery process. 

Lastly, you should also take into account the cost of the shipping method. Consider your budget and the value of your products to determine the most cost-effective option. By carefully considering these factors and selecting the right shipping method, you can ensure that your products are delivered safely and efficiently, ultimately leading to customer satisfaction and business growth.

Insure the Package if Necessary

When deciding whether or not to insure your package, there are several factors to take into consideration. Firstly, you need to assess the size and weight of your package. Smaller and lighter packages may be suitable for regular mail or standard shipping methods, while larger or heavier items may require freight or specialised shipping options.

In addition to size and weight, the destination of your package is also important to consider. If you are shipping internationally, you will need to choose a method that offers reliable international delivery services to ensure your package reaches its intended recipient in a timely manner.

Another crucial factor is the level of security and tracking provided by the shipping method. It is essential to select a method that offers visibility and peace of mind throughout the delivery process, both for you and your customers. This helps to ensure that the package is handled with care and can be easily tracked if any issues arise.

Finally, cost is an important consideration. Evaluate your budget and the value of your products to determine the most cost-effective shipping option for insuring your package. While insurance adds an additional cost to the shipping process, it can provide valuable protection in case of damage, loss, or theft.

By carefully considering these factors and selecting the right shipping method, including insurance if necessary, you can ensure that your products are delivered safely and efficiently. Ultimately with this you can achieve customer satisfaction.

Communicate with the Customer

Customer communication is a crucial aspect of business growth and success. By effectively communicating with your customers, you can build trust and loyalty, resolve any issues or concerns, and ultimately enhance the overall customer experience. There are several key strategies that can help you improve your customer communication.

Firstly, it is important to be responsive to customer inquiries and feedback. Promptly addressing any questions or concerns shows your customers that you value their input and are dedicated to providing excellent service. Utilise various communication channels such as email, phone calls, or social media to ensure that customers can reach you easily and receive a timely response.

Secondly, personalise your communication to make it more meaningful and relevant to each customer. Use their names, refer to previous interactions or purchases, and tailor your messages to their specific needs or preferences. This personal touch can build rapport with customers and grow your business. This can be done through surveys, reviews, or simply asking for their input. By actively seeking feedback and implementing changes based on their suggestions, you show that you prioritise their satisfaction and are committed to continuous improvement.

Handle Returns and Customer Service

When it comes to handling returns and customer service, there are a few key strategies that can help ensure a positive experience for your customers. First and foremost, it’s crucial to provide multiple communication channels through which customers can easily reach you and receive a timely response. This can include options such as email, phone calls, or even social media platforms. By offering various ways for customers to reach out, you’re demonstrating that you value their feedback and are committed to addressing any concerns they may have.

Another important aspect of effective customer service is personalization. Taking the time to personalise your communication with customers can make a significant difference in how they perceive your business. Using their names, referring back to previous interactions or purchases, and tailoring your messages to their specific needs or preferences can make customers feel valued and appreciated. This personal touch fosters a strong connection between your business and them, increasing their loyalty and likelihood of repeat purchases.

Conclusion

In conclusion, when it comes to shipping skin care products, it is important to prioritize the safety and protection of the products. This can be achieved by using appropriate packaging materials, such as bubble wrap or air-filled cushions, to prevent any damage during transit. Additionally, it is crucial to select a reliable shipping carrier that specializes in handling fragile items, as they will have the necessary expertise and resources to ensure the products arrive in optimal condition. Finally, it is recommended to include clear instructions and guidelines for the recipient on how to handle and store the skin care products upon delivery, to further guarantee customer satisfaction.

How To Remove Permanent Makeup

Permanent makeup can be a convenient and time-saving solution for many people, but there may come a time when you want to remove it. Whether you’re looking to change your look or correct a mistake, removing permanent makeup at home is possible with the right techniques. In this blog post, we will explore various methods and tips for safely and effectively removing permanent makeup in the comfort of your own home. From natural remedies to professional-grade products, we will cover everything you need to know to successfully remove permanent makeup without any adverse effects. So, if you’re ready to say goodbye to your permanent makeup, keep reading to learn how to do it yourself at home.

Understand the Risks and Limitations

When it comes to removing permanent makeup at home, it’s important to understand the risks and limitations involved. While there are various methods available, it’s crucial to approach the process with caution and be aware of any potential side effects or complications that may arise.

Firstly, it’s essential to note that permanent makeup is designed to be long-lasting and difficult to remove. Therefore, attempting to remove it at home may not always yield the desired results.

Additionally, it’s crucial to consider the specific type of permanent makeup you have. Different techniques and pigments may require different removal methods. It’s recommended to consult with a professional or seek advice from a reputable source to determine the most appropriate approach for your specific situation.

Moreover, DIY removal methods may carry certain risks, such as skin irritation, allergic reactions, or scarring. It’s important to thoroughly research and understand the potential risks associated with each removal technique before proceeding.

It’s also worth mentioning that the effectiveness of home removal methods can vary greatly depending on factors such as the age and depth of the permanent makeup, as well as individual skin characteristics. It’s important to have realistic expectations and understand that complete removal may not always be possible.

To ensure a safe and successful removal process, it’s advisable to follow proper hygiene practices and carefully follow instructions provided by professionals or reputable sources. If you experience any discomfort during the removal process, it is very important to seek medical advice.

In summary, while it may be tempting to attempt removing permanent makeup at home, it’s important to understand the risks and limitations involved. Professional assistance or guidance from reputable sources can help ensure a safe and effective removal process.

Research Different Methods of Permanent Makeup Removal

When considering removing permanent makeup, it is essential to conduct thorough research on the different methods available. While there are various home removal techniques, it is important to be aware of the potential risks associated with these methods. DIY removal methods may carry certain risks, such as skin irritation, allergic reactions, or scarring. It is crucial to thoroughly understand the potential risks before proceeding with any removal technique.

It is worth noting that the effectiveness of home removal methods can vary greatly depending on factors such as the age and depth of the permanent makeup, as well as individual skin characteristics. It is important to have realistic expectations and understand that complete removal may not always be possible.

To ensure a safe and successful removal process, it is advisable to follow proper hygiene practices and carefully follow instructions provided by professionals or reputable sources. These sources can provide guidance for your specific situation.

In summary, while it may be tempting to attempt removing permanent makeup at home, it is important to understand the risks and limitations involved. Thorough research and professional guidance can help ensure a safe and effective removal process.

Consult with a Dermatologist or Professional for Advice

If you are considering removing permanent makeup at home, it is important to consult with a dermatologist or professional for advice. The effectiveness of home removal methods can vary greatly depending on factors such as the age and depth of the permanent makeup, as well as individual skin characteristics. 

It is crucial to have realistic expectations and understand that complete removal may not always be possible. By consulting with a professional, they can provide guidance on the best methods for your specific situation and ensure a safe and successful removal process. It is also important to follow proper hygiene practices and carefully follow instructions provided by professionals or reputable sources. 

Professional assistance can help ensure a safe and effective removal process. While it may be tempting to attempt removing permanent makeup at home, it is important to understand the risks and limitations involved. Thorough research and professional guidance can help ensure a safe and effective removal process.

Gather the Necessary Supplies for Removal

Before attempting to remove permanent makeup at home, it is important to gather the necessary supplies. These supplies may vary depending on the removal method you choose. It is recommended to consult with a dermatologist or professional to determine the best method for your specific situation. They can provide guidance on the supplies you will need.Some common supplies that may be needed for permanent makeup removal include:

Mild cleanser:

A gentle cleanser will be needed to cleanse the area before and after the removal process. It is important to choose a cleanser that is non-irritating and suitable for your skin.

Exfoliating scrub

An exfoliating scrub can help to remove dead skin cells and promote the penetration of removal products. Choose a gentle scrub that is specifically formulated for the face.

Removal product:

There are various removal products available on the market, such as creams, gels, or serums. These products typically contain ingredients that help to break down the pigment in the permanent makeup. It is important to choose a reputable and high-quality product that is safe for use on the face.

Cotton pads or swabs:

These can be used to apply the removal product and gently wipe away the dissolved pigment. Choose soft and lint-free cotton pads or swabs to avoid irritation.

Moisturizer:

After the removal process, it is important to moisturize the skin to keep it hydrated and help with the healing process. Choose a moisturizer that is suitable for your skin type and free from harsh ingredients.

Sunscreen:

Protecting the treated area from the sun is crucial to prevent further pigment darkening or damage. Apply a broad-spectrum sunscreen with an SPF of at least 30, and reapply regularly if you are spending time outdoors.

Remember, it is important to follow the instructions provided by professionals or reputable sources when using these supplies. If you experience any adverse reactions or difficulties during the removal process, seek medical advice promptly.

Follow Proper Safety Precautions and Instructions

When using cotton pads or swabs for applying removal products and wiping away dissolved pigment, it is important to choose soft and lint-free options to avoid irritation. Additionally, after the removal process, moisturizing the skin is crucial to keep it hydrated and aid in the healing process. Be sure to select a moisturizer that is suitable for your skin type and does not contain harsh ingredients.

Furthermore, protecting the treated area from the sun is essential to prevent further pigment darkening or damage. To do this, apply a broad-spectrum sunscreen with a minimum SPF of 30 and make sure to reapply regularly, especially if you are spending time outdoors.

Remember, it is vital to strictly follow the instructions provided by professionals or reputable sources when using these supplies. If you experience any adverse reactions or difficulties during the removal process, seek medical advice promptly to ensure your safety and well-being.

Start with Gentle Removal Techniques

to ensure the safety and effectiveness of the tattoo removal process. It is important to follow the instructions provided by professionals or reputable sources when using removal supplies. This includes using soft and lint-free cotton pads or swabs to apply removal products and wipe away dissolved pigment. By choosing gentle techniques, you can minimize the risk of irritation or damage to the skin.

It is also crucial to moisturize the treated area after the removal process. This helps to keep the skin hydrated and aids in the healing process. It is important to select a moisturizer that is suitable for your skin type and does not contain harsh ingredients that could further irritate the skin.

In addition, protecting the treated area from the sun is essential to prevent further pigment darkening or damage. Applying a broad-spectrum sunscreen with a minimum SPF of 30 will help shield the skin from harmful UV rays.

Throughout the entire tattoo removal process, it is vital to strictly follow the instructions provided by professionals or reputable sources. If you experience any adverse reactions or difficulties during the removal process, it is important to seek medical advice promptly. This will ensure your safety and well-being during the removal process.

By following these proper safety precautions and instructions, you can safely and effectively remove your tattoo. Remember, the key is to be patient and persistent, as tattoo removal may require multiple sessions for desired results.

Be Patient and Persistent in the Removal Process

When it comes to removing a tattoo, it is crucial to approach the process with patience and persistence. Removing a tattoo takes time and multiple sessions may be required to achieve the desired results. It is important to understand that tattoo removal is not an overnight fix, but rather a gradual process that requires commitment and dedication.

One key aspect of the removal process is protecting the treated area from the sun. Sun exposure can not only cause further pigment darkening but also damage the skin. Applying a broad-spectrum sunscreen with a minimum SPF of 30 is essential in shielding the skin from harmful UV rays.

Throughout the entire tattoo removal process, it is vital to strictly follow the instructions provided by professionals or reputable sources. These instructions may include specific aftercare measures or recommendations for optimal results. By following these instructions diligently, you can ensure the safety and effectiveness of the removal process.

If at any point during the removal process, you experience adverse reactions or difficulties, it is crucial to seek medical advice promptly. Professionals can provide guidance and support, ensuring your safety and well-being throughout the process.

removing a tattoo requires patience and persistence. It is important to protect the treated area from the sun, strictly follow professional instructions, and seek medical advice if needed. By following these proper safety precautions and instructions, you can safely and effectively remove your tattoo. Remember, the key is to be patient and persistent, understanding that the removal process may take time and multiple sessions for desired results.

Seek Professional Help if Needed or if Removal is Unsuccessful

When attempting to remove a tattoo, it is important to follow the instructions diligently to ensure the safety and effectiveness of the removal process. However, if at any point during the removal process you experience adverse reactions or difficulties, it is crucial to seek medical advice promptly. Professionals who specialize in tattoo removal can provide guidance and support, ensuring your safety and well-being throughout the process.

It is always better to address any concerns or issues as soon as they arise to prevent further complications. Furthermore, understanding that removing a tattoo requires patience and persistence, it is important to protect the treated area from the sun, strictly follow professional instructions, and seek medical advice if needed. By following these proper safety precautions and instructions, you can safely and effectively remove your tattoo. Remember, the key is to be patient and persistent, understanding that the removal process may take time and multiple sessions for desired results.

Conclusion

In conclusion, removing permanent makeup at home can be a challenging and potentially risky task. It is highly recommended to consult with a professional or seek professional help to ensure safe and effective removal. There are various methods available for removing permanent makeup, such as laser removal, saline tattoo removal, and tattoo removal creams. However, these methods should only be performed by trained professionals to avoid complications or damage to the skin.

How Do Adjustable Beds Work?

Adjustable beds have become increasingly popular for their ability to provide customizable comfort and support while sleeping or lounging. But how exactly do these beds work? In this blog post, we will delve into the mechanics behind adjustable beds and explain how they can improve your sleep and overall well-being. By understanding the inner workings of adjustable beds, you’ll be able to make an informed decision when considering investing in one for yourself. So, let’s dive in and explore the fascinating world of adjustable beds!

Introduction to Adjustable Beds

Adjustable beds have revolutionized the way we sleep and relax. These beds are designed to offer customizable comfort and support, allowing users to adjust the position of the bed to suit their specific needs. Whether you want to elevate your head to alleviate snoring or relieve back pain, or simply find the perfect position for reading or watching TV, an adjustable bed can provide the flexibility you need.

The mechanics behind adjustable beds are quite fascinating. Most adjustable beds have a motorized base that allows for easy adjustment of the bed’s position. This base is typically operated by a remote control or a smartphone app, making it convenient to find your desired position without having to manually adjust the bed.

One common mechanism found in adjustable beds is the hinge system, which allows for the smooth articulation of the bed’s sections. This system ensures that the bed can be adjusted seamlessly without any jerking or jolting movements. Additionally, many adjustable beds have a wall-hugging feature, which means that the bed slides back as it is adjusted to keep you in close proximity to your nightstand.

These can include massage functions, built-in USB ports for charging devices, under-bed lighting, and even voice control capabilities. These features can further contribute to your overall comfort and convenience.

Investing in an adjustable bed can have numerous benefits for your sleep and overall well-being. By allowing you to find the perfect position for your body, these beds can alleviate aches and pains, promote better circulation, and reduce snoring and sleep apnea symptoms. They are especially beneficial for individuals with medical conditions or mobility issues, as they can provide the necessary support and assistance.

Explanation of the mechanics of adjustable beds

An adjustable bed is designed with mechanisms that allow the bed to be adjusted to different positions. These mechanisms are typically controlled by a remote or buttons on the bed frame. When adjusting the bed, the mechanisms work together to smoothly and seamlessly change the position of the bed without any jerking or jolting movements.

Benefits of using an adjustable bed

include improved comfort and convenience. These beds are specifically designed to provide customizable support, allowing you to find the perfect position for your body. This can alleviate aches and pains, promote better circulation, and reduce symptoms of snoring and sleep apnea.

Adjustable beds are especially beneficial for individuals with medical conditions or mobility issues, as they can provide the necessary support and assistance. The mechanics of adjustable beds are designed to smoothly and seamlessly change the position of the bed without any jerking or jolting movements. 

Maintenance and Care Tips for Adjustable Beds

Taking care of your adjustable bed is important to ensure its longevity and optimal performance. Here are a few maintenance and care tips to keep in mind.

Regularly clean the bed frame and mattress:

Dust and dirt can accumulate on the bed frame and mattress over time. Use a soft cloth or vacuum cleaner to remove any debris and keep the bed clean.

Check the electrical components:

If your adjustable bed comes with electrical components, such as motors, make sure to check them regularly to ensure they are functioning properly. Look for any loose wires or signs of damage, and if you notice any issues, contact a professional for assistance.

Lubricate moving parts:

Over time, the moving parts of your adjustable bed may need some lubrication to ensure smooth operation. Consult the manufacturer or instructions for using the appropriate lubricant that is important to you.

Protect the mattress:

It’s a good idea to use a mattress protector to keep your mattress clean and free from spills or stains.

Avoid overloading the bed:

Adjustable beds have weight limits, so it’s essential to follow the manufacturer’s guidelines to prevent any damage. Overloading the bed can put excessive strain on the frame and motors, leading to potential malfunctions.

Use caution when adjusting the bed:

When adjusting the bed’s position, do so slowly and avoid abrupt movements. This will prevent unnecessary strain on the mechanisms and ensure a longer lifespan for your adjustable bed.

Remember, proper maintenance and care is key to preserving the functionality of your adjustable bed. By following these tips, you can continue to enjoy the comfort and convenience it offers for years to come.

Different sleeping positions for adjustable beds

can greatly enhance your comfort and sleep quality. Adjustable beds offer various positions that can alleviate pressure points and provide support to different parts of your body. Here are some common sleeping positions for adjustable beds.

Zero gravity position:

This position elevates your head and feet slightly, which can help improve circulation and reduce pressure on your lower back. It mimics the posture astronauts assume during liftoff, hence the name “zero gravity.” It is a popular position for those with back pain or acid reflux.

Raised head position:

Elevating just the head can be beneficial for individuals who snore or have sleep apnea. It helps keep airways open.

Raised foot position:

Elevating the foot of the bed can improve circulation and relieve swelling in the legs and feet. This position is particularly beneficial for individuals with poor circulation or those recovering from surgery.

Side sleeping position:

Adjustable beds allow you to adjust the angle of your upper body while still maintaining a side sleeping position. This can alleviate pressure on the shoulders and hips and provide better spinal alignment.

It is important to note that while adjustable beds offer numerous benefits, there are also some precautions to keep in mind:

  • Avoid overloading the bed: Adjustable beds have weight limits, so it’s essential to follow the manufacturer’s guidelines to prevent any damage. Overloading the bed can put excessive strain on the frame and motors, leading to potential malfunctions.
  • Use caution when adjusting the bed: When adjusting the bed’s position, do so slowly and avoid abrupt movements. This will prevent unnecessary strain on the mechanisms and ensure a longer lifespan for your adjustable bed.

Common misconceptions about adjustable beds

include the belief that they are only for the elderly or those with health issues. While adjustable beds can certainly benefit individuals with specific needs, such as poor circulation or recovering from surgery, they are not limited to these demographics. Adjustable beds offer a range of customizable positions that can improve overall comfort and sleep quality for anyone.

One misconception is that adjustable beds are uncomfortable or restrict movement. In reality, these beds are designed with ergonomics in mind, allowing users to find their optimal position for relaxation or sleep. Whether you prefer to elevate your head, legs, or both, adjustable beds provide flexibility to accommodate individual preferences.

Another misconception is that adjustable beds are expensive and out of reach for most people. While it is true that some high-end models can be quite costly, there are also budget-friendly options available that provide the same benefits without breaking the bank. Additionally, the long-term health and comfort advantages of an adjustable bed can outweigh the initial investment.

Lastly, some people believe that adjustable beds are difficult to maintain or require specialized care. In reality, these beds are relatively easy to maintain. Regular cleaning and checking for any loose connections or malfunctioning parts are typically all that’s needed to keep an adjustable bed in good working order. Following the manufacturer’s guidelines for weight limits and adjusting the bed slowly and carefully can also help prolong its lifespan.

adjustable beds offer a variety of benefits for individuals of all ages and health conditions. By dispelling common misconceptions and understanding the proper usage and maintenance, anyone can enjoy the comfort and convenience that these beds provide.

Conclusion

In conclusion, adjustable beds work by allowing users to adjust the position and angle of the bed to their desired comfort level. This is typically done through a remote control or buttons on the bed frame. The adjustable features include raising or lowering the head and foot sections of the bed, as well as adjusting the overall height. These beds are designed to provide customizable support and promote better sleep, especially for individuals with certain health conditions or those who prefer to sleep in a more elevated position. Adjustable beds often come with additional features such as massage settings, USB ports, and under-bed lighting for added convenience and comfort.

  • Go to page 1
  • Go to page 2
  • Go to Next Page »

Primary Sidebar